INTRODUCTION:
Have you ever wondered how to easily get your videos ready and play them on the internet? In this blog post, we’re going to explore the world of working with videos for the web. We’ll check out a powerful tool called FFmpeg, which helps us change videos into web-friendly formats, and we’ll learn how to put these videos on web pages using JWPlayer.
For anyone who does things like making websites, creating content, or working on multimedia projects, it’s super important to be really good at dealing with videos. When you finish reading this post, you’ll know how to change your videos so they work well on the web and how to show them on your website using XAMPP. Let’s start learning!
Converting Videos to HSL:
HSL:
Do you want to make your videos more colorful and vibrant? You can do that by changing your videos into a special format called HSL, which stands for Hue, Saturation, and Lightness. This format lets you control the colors, brightness, and saturation in your videos, almost like using a magical color palette.
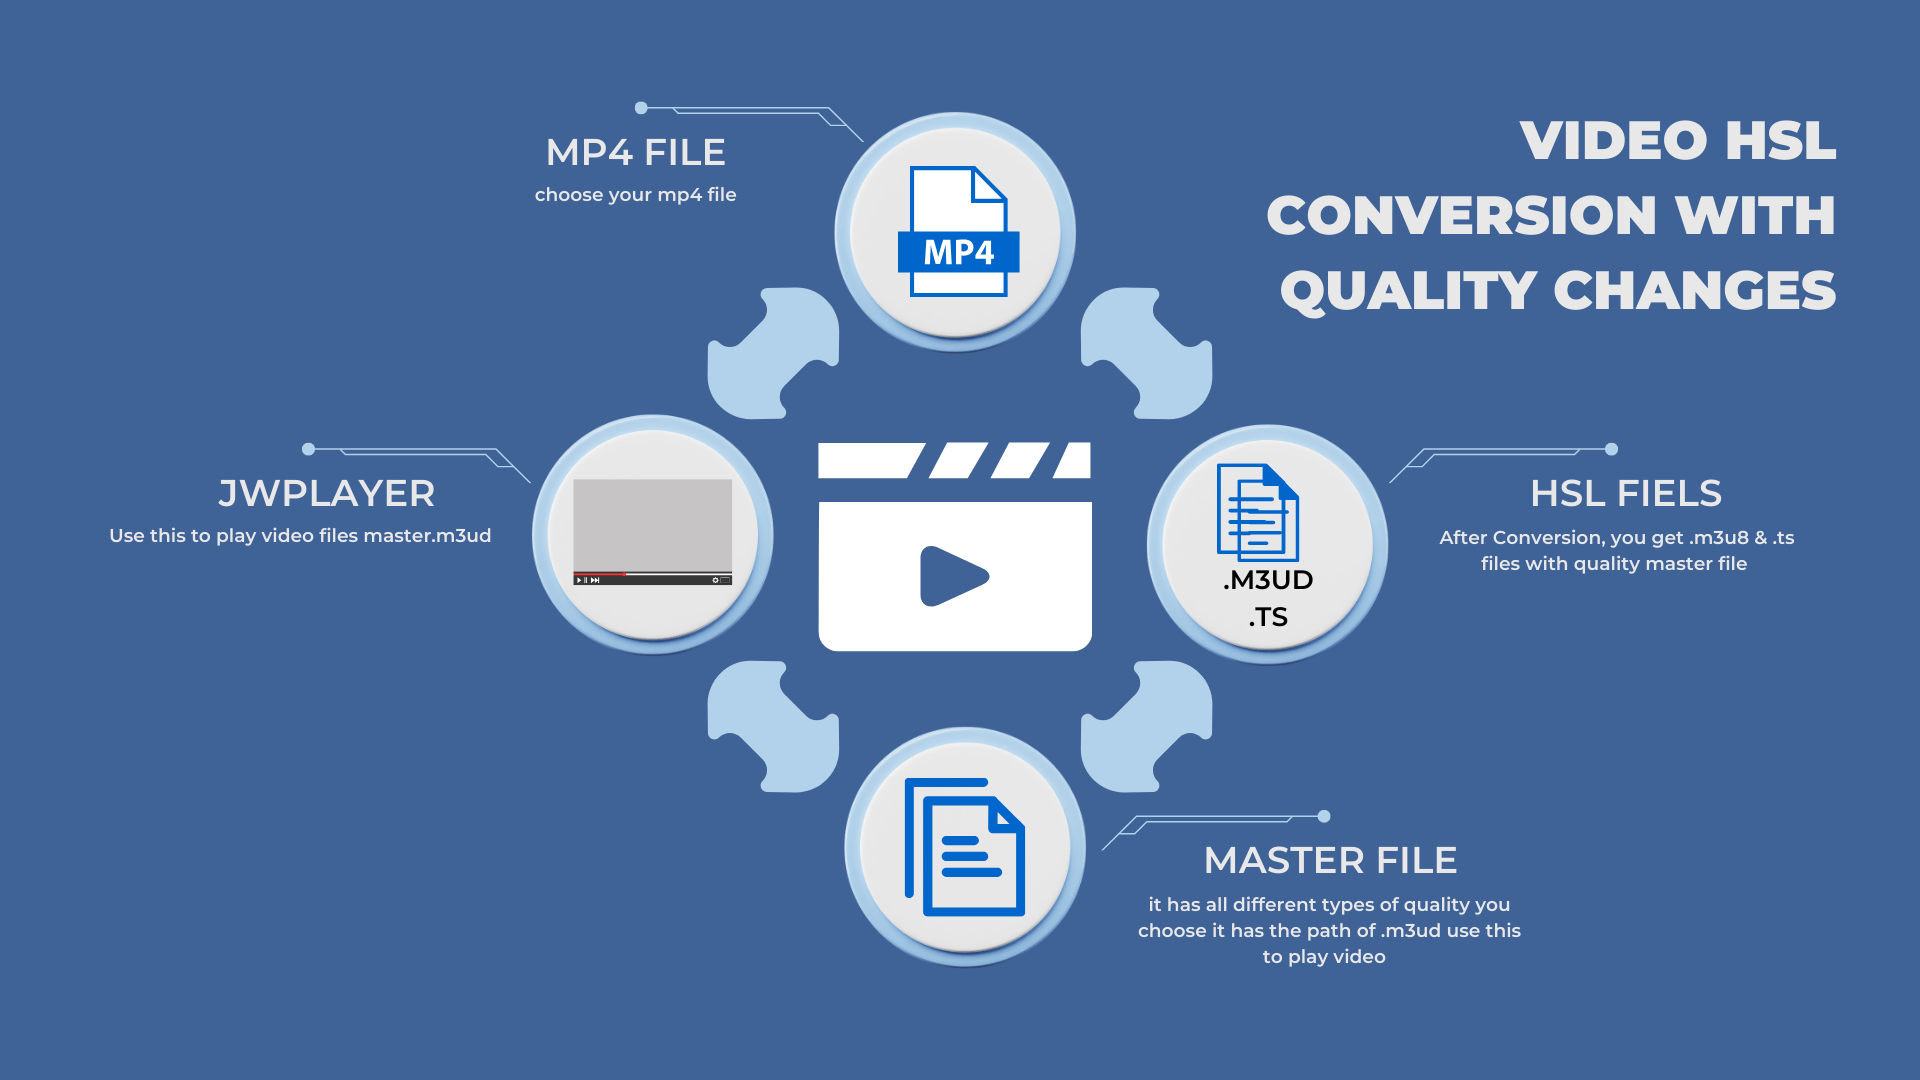
.m3u8 Files: The Video Streaming Plan:
When you share videos on the internet, you use .m3u8 files, which act like a plan for video streaming. Imagine it as a list that tells web players how to play your video smoothly. Inside this list, small video pieces called .ts files are included (we’ll explain those next). .m3u8 files enable browsers to understand which .ts files to load and play in the right order, ensuring your video plays smoothly without problems.
.ts Files: The Video Building Blocks:
.ts files, or Transport Stream files, are like the building blocks of your video. These small parts of your video can be loaded and played one by one. When you play them in the correct order, they create your entire video.
These .ts files are handy for streaming because they make your video adaptable. If someone has a slow internet connection, the player can still play the video smoothly by choosing which .ts files to load and at what quality.
In summary, changing videos to HSL lets you control colors. .m3u8 files are like plans for web video, and .ts files are the building blocks that make your video play well on the web. Understanding these ideas helps you make your videos more appealing and engaging online.
ffmpeg -i input_video.mp4 -vf "format=yuv444p,eq=brightness=1.5:saturation=1.0:hue=0" -c:v libx264 -c:a aac -strict experimental output_video.mp4
//To convert a video to HSL and adjust its brightness using FFmpeg
How to Convert a Video to HSL with Different Qualities Using FFmpeg:
On the below code, you have to edit the path of file input and output.
ffmpeg -i source.mp4 -vf "scale=854:480" -b:v 800k -c:v h264 -c:a aac -strict -2 -f hls -hls_time 4 -hls_playlist_type vod -hls_segment_filename 480p/segments/output_%03d.ts 480p/playlist/output.m3u8 -map 0:v -map 0:aHere’s a breakdown of what this command does:
ffmpeg -i source.mp4: This part tells FFmpeg to usesource.mp4as the input video.-vf "scale=854:480": This sets the video resolution to 854×480 pixels, which is 480p quality.-b:v 800k: This controls the video bitrate, which affects video quality. In this case, it’s set to 800k (800 kilobits per second).-c:v h264: This specifies the video codec as H.264, a common video codec.-c:a aac: This specifies the audio codec as AAC, a common audio codec.-strict -2: This flag allows the use of experimental AAC audio encoding.-f hls: This tells FFmpeg to output in the HLS (HTTP Live Streaming) format.-hls_time 4: This sets the segment duration to 4 seconds.-hls_playlist_type vod: This specifies that the playlist is for video-on-demand (VOD) content.-hls_segment_filename 480p/segments/output_%03d.ts: This determines the naming pattern for individual video segments in the 480p quality.480p/playlist/output.m3u8: This is the name of the final playlist file for 480p quality.-map 0:v -map 0:a: These options map the video and audio streams from the source video to the output.
Running this command will create an HLS playlist (output.m3u8) and corresponding video segments (output_001.ts, output_002.ts, and so on) for 480p quality. You can adjust the resolution (scale), bitrate (-b:v), and other parameters for different qualities (e.g., 720p, 2K) by modifying the command accordingly.
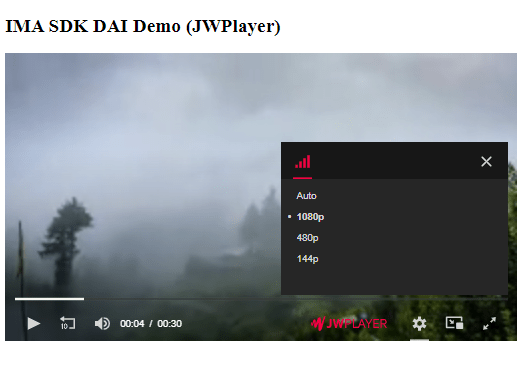
Setting Up JWPlayer for Web Playback:
On the below code, you have to edit the path.MWU8 MASTER file
This path:’http://localhost/convert-video-to-hls-format/output/natureing.m3u8′;
<!DOCTYPE html>
<html>
<head>
  <title>IMA SDK DAI Demo (JWPlayer)</title>
  <script src="//content.jwplatform.com/libraries/gVFmc0KC.js"></script>
  <script type="text/javascript" src="//imasdk.googleapis.com/js/sdkloader/ima3_dai.js"></script>
  <style>
    /* Add your CSS styles here */
  </style>
</head>
<body>
  <h2>IMA SDK DAI Demo (JWPlayer)</h2>
  <div id="video">
    <div id="player"></div>
  </div>

  <script>
    var BACKUP_STREAM =
      'http://localhost/convert-video-to-hls-format/output/natureing.m3u8';

    // Live stream asset key.
    var TEST_ASSET_KEY = "sN_IYUG8STe1ZzhIIE_ksA";

    // VOD content source and video IDs.
    var TEST_CONTENT_SOURCE_ID = "2528370";
    var TEST_VIDEO_ID = "tears-of-steel";

    var isAdBreak;

    function initPlayer() {
      jwplayer('player').setup({
        'file': BACKUP_STREAM,
        'primary': 'html5',
        'width': 640,
        'height': 360,
        'hlshtml': true,
        'hlsjsdefault': true
      });

      // Turn off controls until stream finishes loading.
      jwplayer().setControls(false);

      jwplayer().on('ready', function(e) {
        initStreamManager();
        requestVODStream(TEST_CONTENT_SOURCE_ID, TEST_VIDEO_ID, null);
      });
    }

    function initStreamManager() {
      var videoElement = jwplayer().getContainer().querySelector('video');
      videoElement.addEventListener('pause', onStreamPause);
      videoElement.addEventListener('play', onStreamPlay);
      streamManager = new google.ima.dai.api.StreamManager(videoElement);
      streamManager.addEventListener(
        [google.ima.dai.api.StreamEvent.Type.LOADED,
         google.ima.dai.api.StreamEvent.Type.ERROR,
         google.ima.dai.api.StreamEvent.Type.AD_BREAK_STARTED,
         google.ima.dai.api.StreamEvent.Type.AD_BREAK_ENDED],
        onStreamEvent,
        false);

      jwplayer().on('meta', function(e) {
        if (streamManager && e.metadata) {
          streamManager.onTimedMetadata(e.metadata);
        }
      });
    }

    function requestVODStream(cmsId, videoId, apiKey) {
      var streamRequest = new google.ima.dai.api.VODStreamRequest();
      streamRequest.contentSourceId = cmsId;
      streamRequest.videoId = videoId;
      streamRequest.apiKey = apiKey;
      streamManager.requestStream(streamRequest);
    }

    function onStreamEvent(e) {
      switch (e.type) {
        case google.ima.dai.api.StreamEvent.Type.LOADED:
          loadStream(e.getStreamData());
          break;
        case google.ima.dai.api.StreamEvent.Type.ERROR:
          console.log('Error loading stream, playing backup stream.');
          jwplayer().setControls(true);
          jwplayer().load([{'file': BACKUP_STREAM}]);
          jwplayer().play();
          break;
        case google.ima.dai.api.StreamEvent.Type.AD_BREAK_STARTED:
          console.log('Ad Break Started');
          isAdBreak = true;
          jwplayer().setControls(false);
          break;
        case google.ima.dai.api.StreamEvent.Type.AD_BREAK_ENDED:
          console.log('Ad Break Ended');
          isAdBreak = false;
          jwplayer().setControls(true);
          break;
        default:
          break;
      }
    }

    function onStreamPause() {
      console.log('Paused');
      if (isAdBreak) {
        jwplayer().setControls(true);
      }
    }

    function onStreamPlay() {
      console.log('Played');
      if (isAdBreak) {
        jwplayer().setControls(false);
      }
    }

    function loadStream(data) {
      var url = data['url'];
      jwplayer().load([{'file': url}]);
      jwplayer().setControls(true);
    }

    // Initialize the player
    initPlayer();
  </script>
</body>
</html>
Project Source Code
I can’t give git because the file size is more than 100 MB. si give Google Drive link try to download it from there Thank You
Link: https://drive.google.com/drive/folders/1Z_G9D-HbavsdAJDDJY-HjwIrM-M-lDcC?usp=sharing
Conclusion:
In this journey through video conversion and web playback, we’ve unlocked the secrets of transforming videos into web-friendly formats and seamlessly showcasing them online. Armed with the FFmpeg tool and JWPlayer, you now have the power to create and share captivating videos with the world.
Remember, video conversion isn’t just about technicalities; it’s about bringing your vision to life and engaging your audience. So, go ahead, explore, experiment, and craft amazing videos that leave a lasting impression. Your video journey has just begun, and the possibilities are endless. Happy creating with SixMedium.!